

I finally got around to making the dye pot
I just do not understand where time goes
I am up before dawn and not in bed until the
wee hours of the morning but
yesterday I accomplished nothing.
Of course I pinned, I researched and
I found some great penny rugs online
but the dye pot, the house chores and
the stitching was not accomplished.
I do believe I need a 'time management course'!

I will explain the onion dyeing below but
I must tell you what happened with
the plastic bag of onion skins today.
It was my first time scavaging at
the grocery store.
Lucas (son) and I were shopping when I
noticed the onion bin had so many skins..
usually they are cleaned but today...
I got a plastic bag and
I moved every onion and filled my bag
with red and white and brown
onion skins.
Of course Lucas thought this should
be on video and so probably
it's now on facebook!
At the checkout the girl wanted to
charge me for the skins.
Manager arrived and I explained.
After a few strange, blank looks and
a few embarrassing moments for Lucas..
I brought the onion skins home
free of charge.

As you see, I do my skins in a crock pot that
I use just for dyeing.
I really don't know if you could use your regular
crock pot...the skins are a food substance so
that part may be ok but
it will stain the pot so it may
be difficult to clean.
Fill the pot with dry skins and
give them a good 'scrunching' with your hands.
Add water and cook on low overnight.
Add water when necessary.
Next day drain and the water left should
be a very dark brown.
The drained skins can be put in the pot again
for a weaker dye but I usually just throw them
in the compost as this amount of dye water
will do quite a bit of dyeing.
This is the 'mother' dye which is why I use the
long cooking period.
I will show more pictures of how to use this
'mother dye' but essentially it is as
simple as using one quarter of the 'mother'
to three quarters of plain water.
This can be adjusted to the shading and
the colours of the wool you need.
Onion will dye both wool and cottons so
this is what you need to dye the threads.
Most dyers will use onion to get a golden.
beige or yellow wool.
This happens when you do not cook the skins
for a long period and when you dye light
shades of wool, cotton etc.
This is not how I use the dye.
I gather my ugly, bright colours and yes
even the very dark colours.
Sometimes I add threads depending on
what I have on hand.
Everything goes in the dye pot with
the diluted 'mother' batch.
I won't go into the process as I will post
that when I do a dye pot but
when your wool comes out of this dye pot
it is different shades but all of those shades
work with each other and because
the dye is brown the wool looks
old and primitive and you have
a nice aged look to your rug.
Simple, easy and you can use such
ugly wool ...it is amazing
how nice some of those pieces
will turn out after the dye process.
I am including some links that will show
a bit more you can do to the dye bath
such as add mordants to change shades
use diffent dye pots instead of mordants and
using other vegetables as dyes.
Click below to go to the web pages.
Baby will be with me tomorrow and so
I will be away from the computer.
That's probably 'a good thing'!
Almost forgot...
Just wanted to mention
the rock wall in the photo with
the dye crock pot
is my kitchen walls and
they are 'real rocks' but
not a 'real rock wall'.
I built the wall some 15 years ago.
I used chicken wire over plywood and plaster
then used rock which I split thin and
lightweight mortar.
Took me the most part of a summer but
I love the look.
Of course I wouldn't leave you without
some nice old rugs.
My very favourite rugs to make are the tongue rugs.
Hope you enjoy!
!E9s2fDPDuBRF93IQ4ZQ~~60_57.JPG)
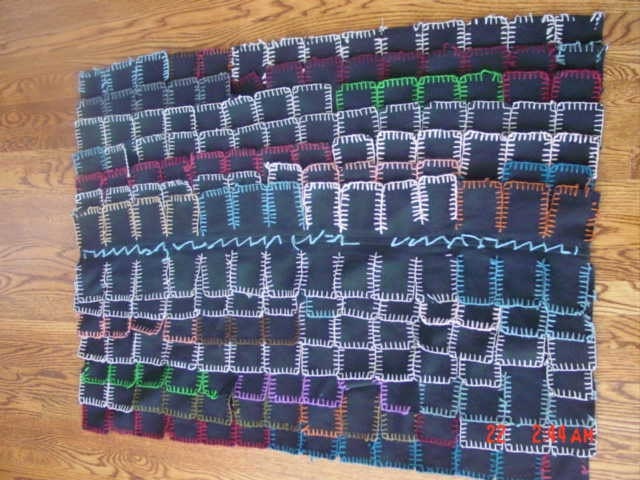
I do not really like this one but
it is such an unusual layout
I have never seen a layout like this before

Oh My! This is a Beauty!
So much work in this old rug.
Do you see the patterns?
The corners, the triangles and
the borders.. beautiful!

A very unusual layout.
Have a great weekend and I will
be back next week to show the
before and afters of the onion dye pots.
Thank you for visiting and your
wonderful comments.
cee
5 comments:
Thank you Felicia,
The post next week when I show before and afters from the onion dye will be much better than today.
I will have baby most of tomorrow and the weekend so no computer or dyeing..
Colleen is the one who does rugs without a base so she will be able to help you when we have the classes. Don't worry we will figure something out for you... see you next week..cee
Great post Cee! You've got me searching out some wools that need a facelift! Enjoy you day tomorrow!
Thanks so much for this information....it was very helpful..never knew any of this about onion skins...now I'm going to start saving mine. BTW, the rock wall was the first thing I noticed in the picture....I LOVE it....your house must be wonderful..would love to see more pictures of it. Take care
Really enjoyed your post about dyeing with onion skins. Can't wait to see your dyed wools. I, too, am pulling out the wools to try this dye method. Blessings
Thanks so much for taking the time to post this info. I really enjoy your photos and writing!!
Post a Comment